Using Cloud 9 on IOOPM
Table of Contents
WHAT IS MY UU USERNAME? If you don’t know your username – don’t
fret! We can figure it out. If your UU email is
sam.chalpin.1234@student.uu.se, then take the two first letters
from sam, the two first from chalpin and the four digits at
the end to form sach1234. Easy as proverbial pie!
It turns out that if you have changed your name since coming to
UU, this scheme only works with your old (first) name. So if your
last name was Batman before changing to Chalpin, try saba1234
instead.
1 Setup: using ssh (only once)
Ssh – Secure SHell – is a wonderful program that allows you to open a terminal session on another machine and execute commands. It is such a standard appliance that it comes preinstalled in macOS and Windows (verified on Windows 10), and most linux distributions depending on configuration.
To run ssh, you need to first open a terminal on your local
machine. On macOS, there is a program called Terminal in The
/Applications/Utilities folder (/Program/Verktyg/ in Swedish)
that you can run. On Windows, you can click on the Start Meny,
then simply start typing cmd.exe and you should be able to
launch the terminal. If you are on Linux, we suspect you are
already there.
Let’s say your UU username is sach1234, you should be able to
login like this:
$ ssh sach1234@trygger.it.uu.se     # <-- this command runs on your local machine
password: ********
... some stuff appears ...

$ whoami                            # <-- this command runs on trygger!
sach1234
%24%20ssh%20sach1234%40trygger.it.uu.se%20%20%20%20%20%23%20%3C--%20this%20command%20runs%20on%20your%20local%20machine%0Apassword%3A%20%2A%2A%2A%2A%2A%2A%2A%2A%0A...%20some%20stuff%20appears%20...%0A%0A%24%20whoami%20%20%20%20%20%20%20%20%20%20%20%20%20%20%20%20%20%20%20%20%20%20%20%20%20%20%20%20%23%20%3C--%20this%20command%20runs%20on%20trygger%21%20%20%20%20%20%20%20%20%20%20%20%20%20%20%20%20%20%20%20%20%20%20%20%20%20%20%20%20%20%20%20%20%0Asach1234%20%0A
To allow Cloud 9 to connect to your account, you need to add a key
in a file called ~/.ssh/authorized_keys. When the course is
over, you can remove this key if you like (it will contain the
word Amazon, so will probably be easy to find).
To install the key, follow the instructions from the AU portal. You will look something like this:
ssh sach1234@trygger.it.uu.se "mkdir -p ~/.ssh; curl https://ioopm.course.it.uu.se/api/getAWSKey2?username=sach1234 >> ~/.ssh/authorized_keys"
Simply copy this command (verify you didn’t lose a character in either end!) and paste it into your terminal. When you run this, some stuff will be printed that you can ignore (the progress bar for downloading the key), and then you are all set.
$ ssh sach1234@trygger.it.uu.se "mkdir -p ~/.ssh; curl https://ioopm.course.it.uu.se/api/getAWSKey2?username=sach1234 >> ~/.ssh/authorized_keys"
% Total    % Received % Xferd  Average Speed   Time    Time     Time  Current
                               Dload  Upload   Total   Spent    Left  Speed
0     0    0     0    0     0      0      0 --:--:--  0:00:01 --:--:--     0
%24%20ssh%20sach1234%40trygger.it.uu.se%20%22mkdir%20-p%20~%2F.ssh%3B%20curl%20https%3A%2F%2Fioopm.course.it.uu.se%2Fapi%2FgetAWSKey2%3Fusername%3Dsach1234%20%3E%3E%20~%2F.ssh%2Fauthorized_keys%22%0A%25%20Total%20%20%20%20%25%20Received%20%25%20Xferd%20%20Average%20Speed%20%20%20Time%20%20%20%20Time%20%20%20%20%20Time%20%20Current%0A%20%20%20%20%20%20%20%20%20%20%20%20%20%20%20%20%20%20%20%20%20%20%20%20%20%20%20%20%20%20%20Dload%20%20Upload%20%20%20Total%20%20%20Spent%20%20%20%20Left%20%20Speed%0A0%20%20%20%20%200%20%20%20%200%20%20%20%20%200%20%20%20%200%20%20%20%20%200%20%20%20%20%20%200%20%20%20%20%20%200%20--%3A--%3A--%20%200%3A00%3A01%20--%3A--%3A--%20%20%20%20%200%0A
NOW YOU ARE ALL DONE!
If you want to verify that everything worked, you can do this:
$ ssh sach1234@trygger.it.uu.se "cat ~/.ssh/authorized_keys"
%24%20ssh%20sach1234%40trygger.it.uu.se%20%22cat%20~%2F.ssh%2Fauthorized_keys%22%0A
This will print the contents of your authorized_keys file, which
should look something like this:
ssh-rsa AAAAB3NzaC1yc2EAAasdfAAACCCFFFFDDdEHks1A4dDBp6YBI73qq2c/Xe+4w1T
kgvFwIO7/YECy9ev6RLXIL6dcLnD16MJHkAfSwwcRTMb/W46f0MkkLfqSNe2A1zB5YIbZCd
MUuI9I0jYyOwEZdrJ5WY85Bg7c6jsNY8pF5kfdKDJ1BWK9CZk0Qm3TsNNsMbNSQcmcvx4Ah
rLyjG0iES2FbwZ46m4zy0cuzLnGVzT8O3nizT/XQ5Za3+oiPqFpsszi/lirwnRoposJUHhY
hK9yV57iEPTmQvgg5AfwITyQdjLhdRUqzQ8TsFc+LtebETe/QOqd4TlUUzK5Os0jNMquo6z
jr/5eqxGHnVpY0bjJq6ItJsqdkI5Oaq3cmnJYgLm7EPCLBUAYTQZyk7nKr2n9CI+iOvuYzX
UNJ3Ywu+YB40PS+9QLPLgSzBXF4CieAvqMNzZ2TzgqnKSEPLp1LT21qtbz7UjoISZOlstxG
yd9Hsh0GcXkClEtNrSeJ3CJXaHbydvdMLjVPtLOmHd1rgo9HJ10O/m8LUTK8PHvETkFoBYu
5aTNcL8olIB2r/qH53Q4HvT3hj2h9rC2xoSv/mzx4qsDQRilNinGBthGpTrHuRLLrdiwcD5
5iHNQfykAyJxTxbQwVr2KJLjihPVdhFE0E1JkC9akidUb27ewpbNe5K+B6XqZmI4u7zq6gV
bCdNGXGMv57Q== username+060148586416@cloud9.amazon.com
If you don’t see any printout – you should try the steps above again, and check carefully that you did not accidentally made a mistake while copying.
2 How to Invite Someone into Your Cloud
2.1 Step 1: Click Share
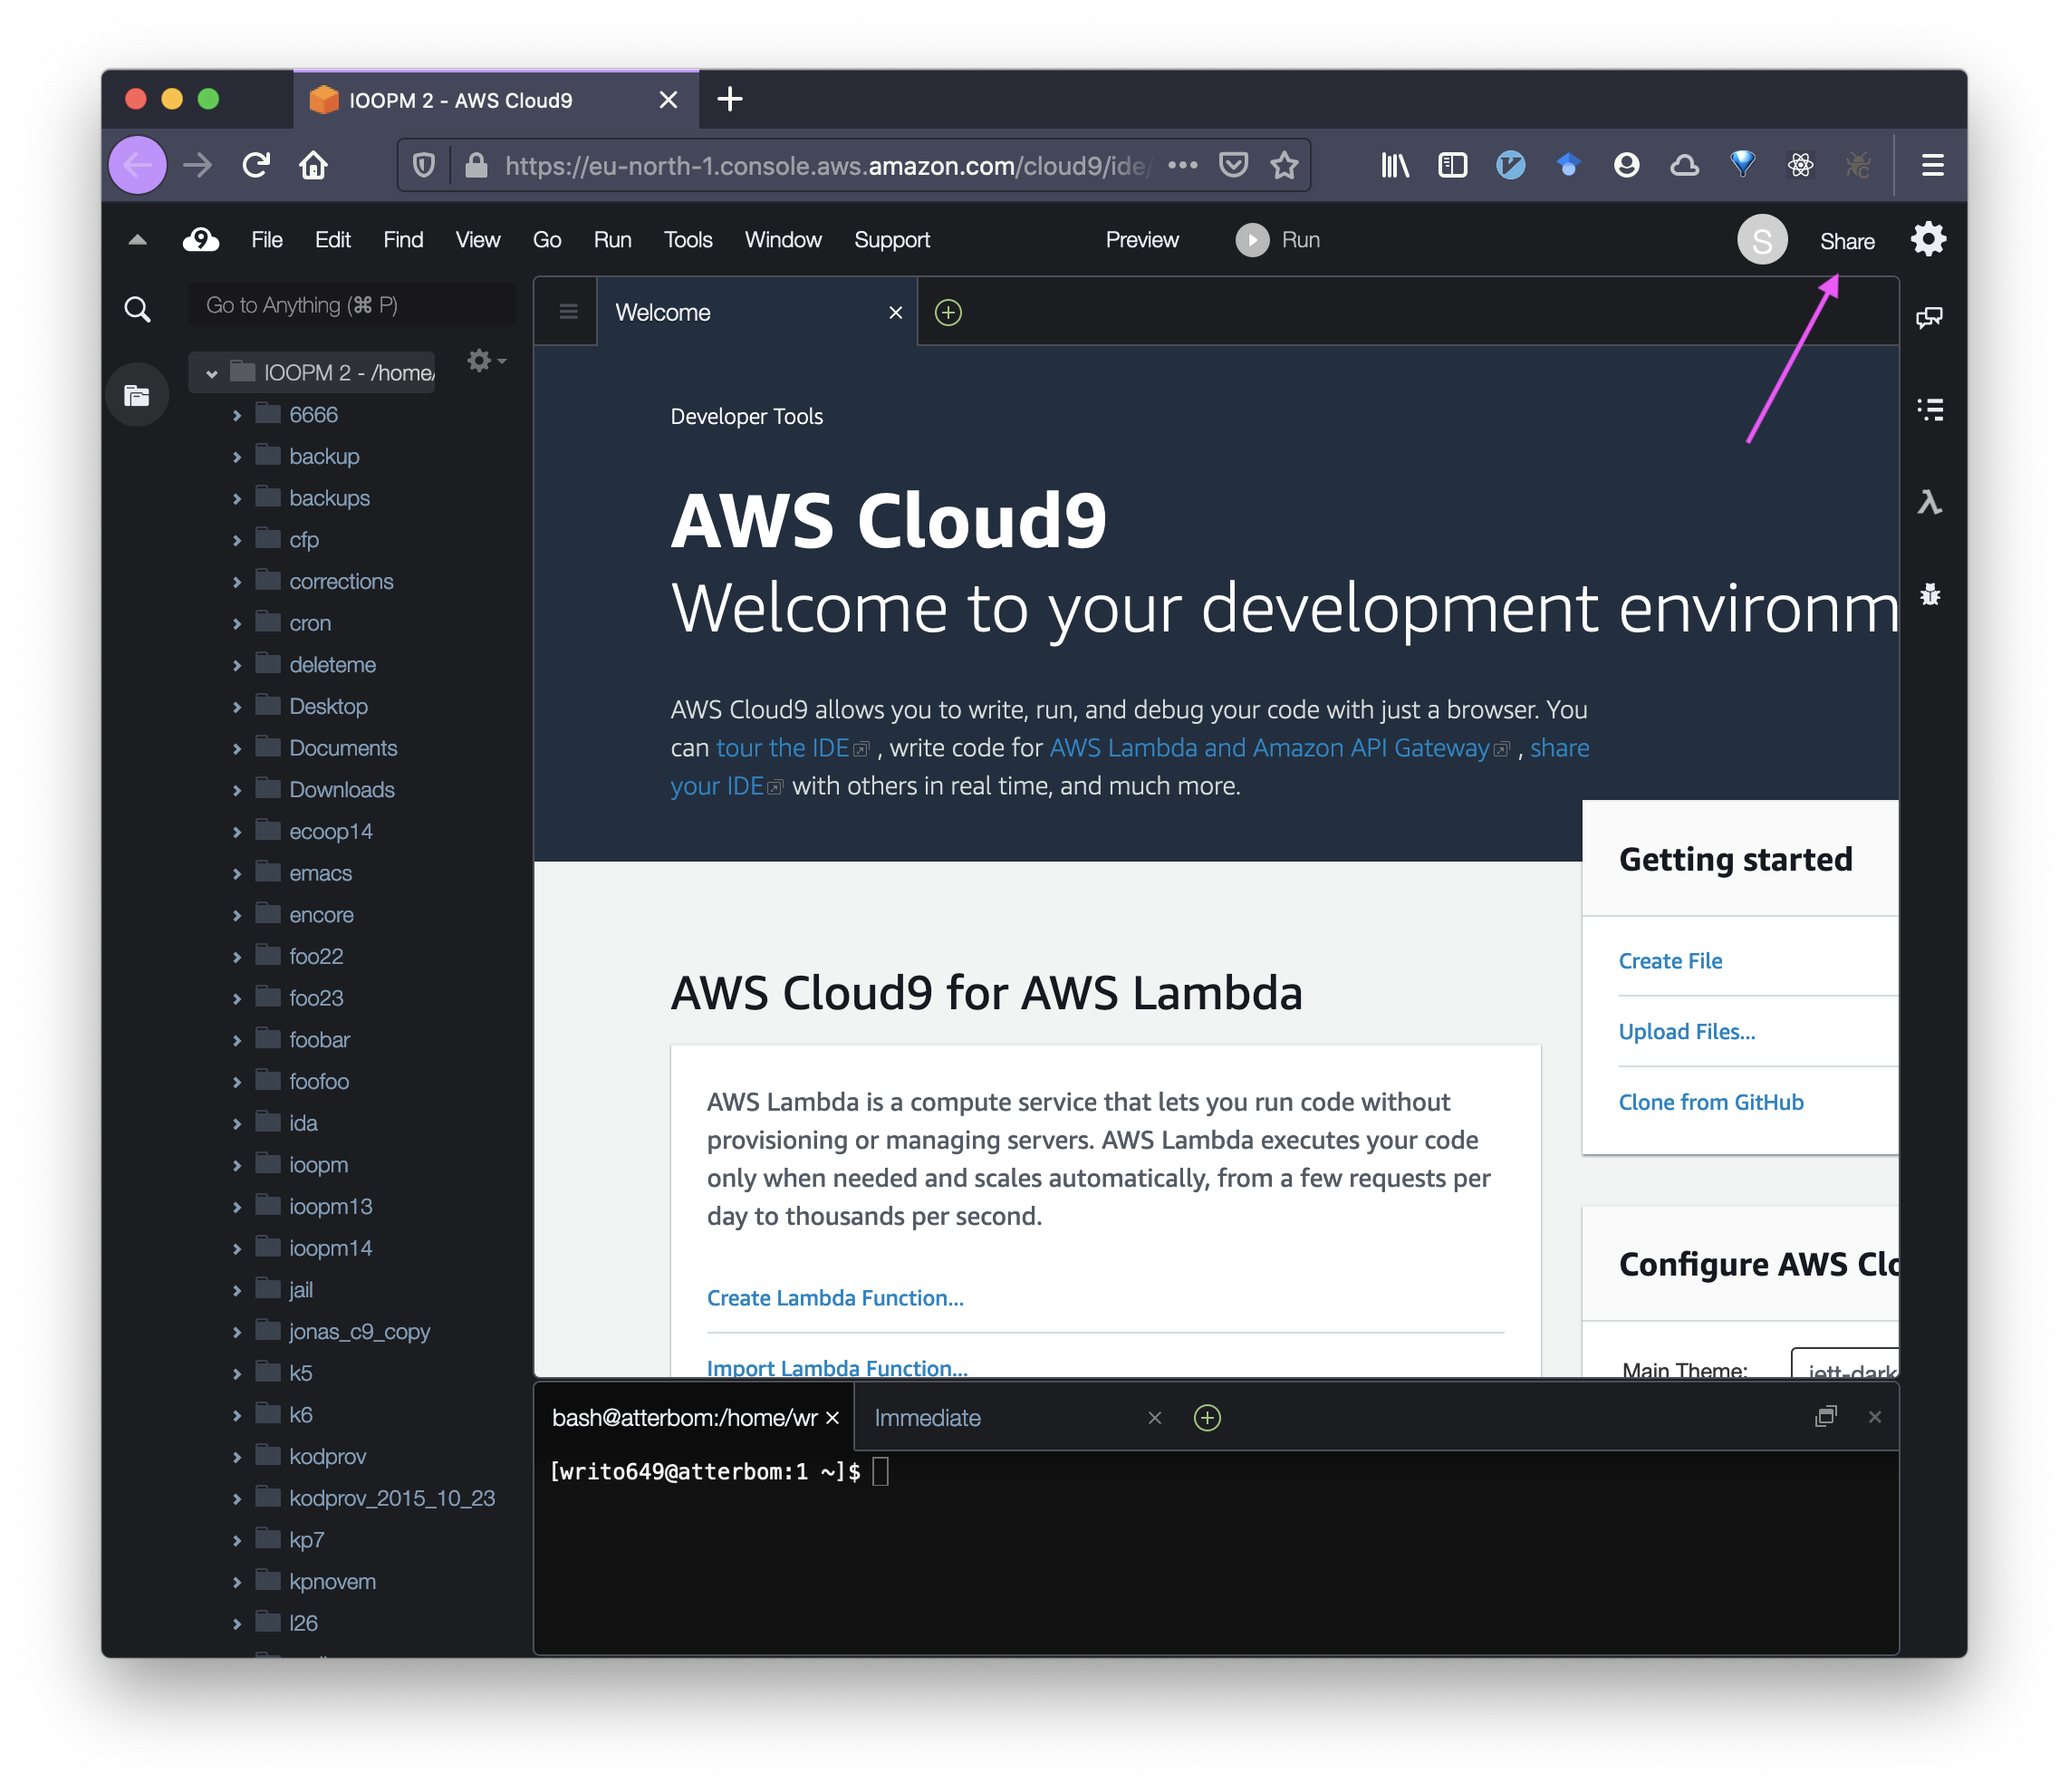
Figure 1: Click Share
2.2 Step 2: Enter username of the person you want to invite
Note that we have randomized usernames for Cloud 9 so you cannot guess. You need to confer with each other.
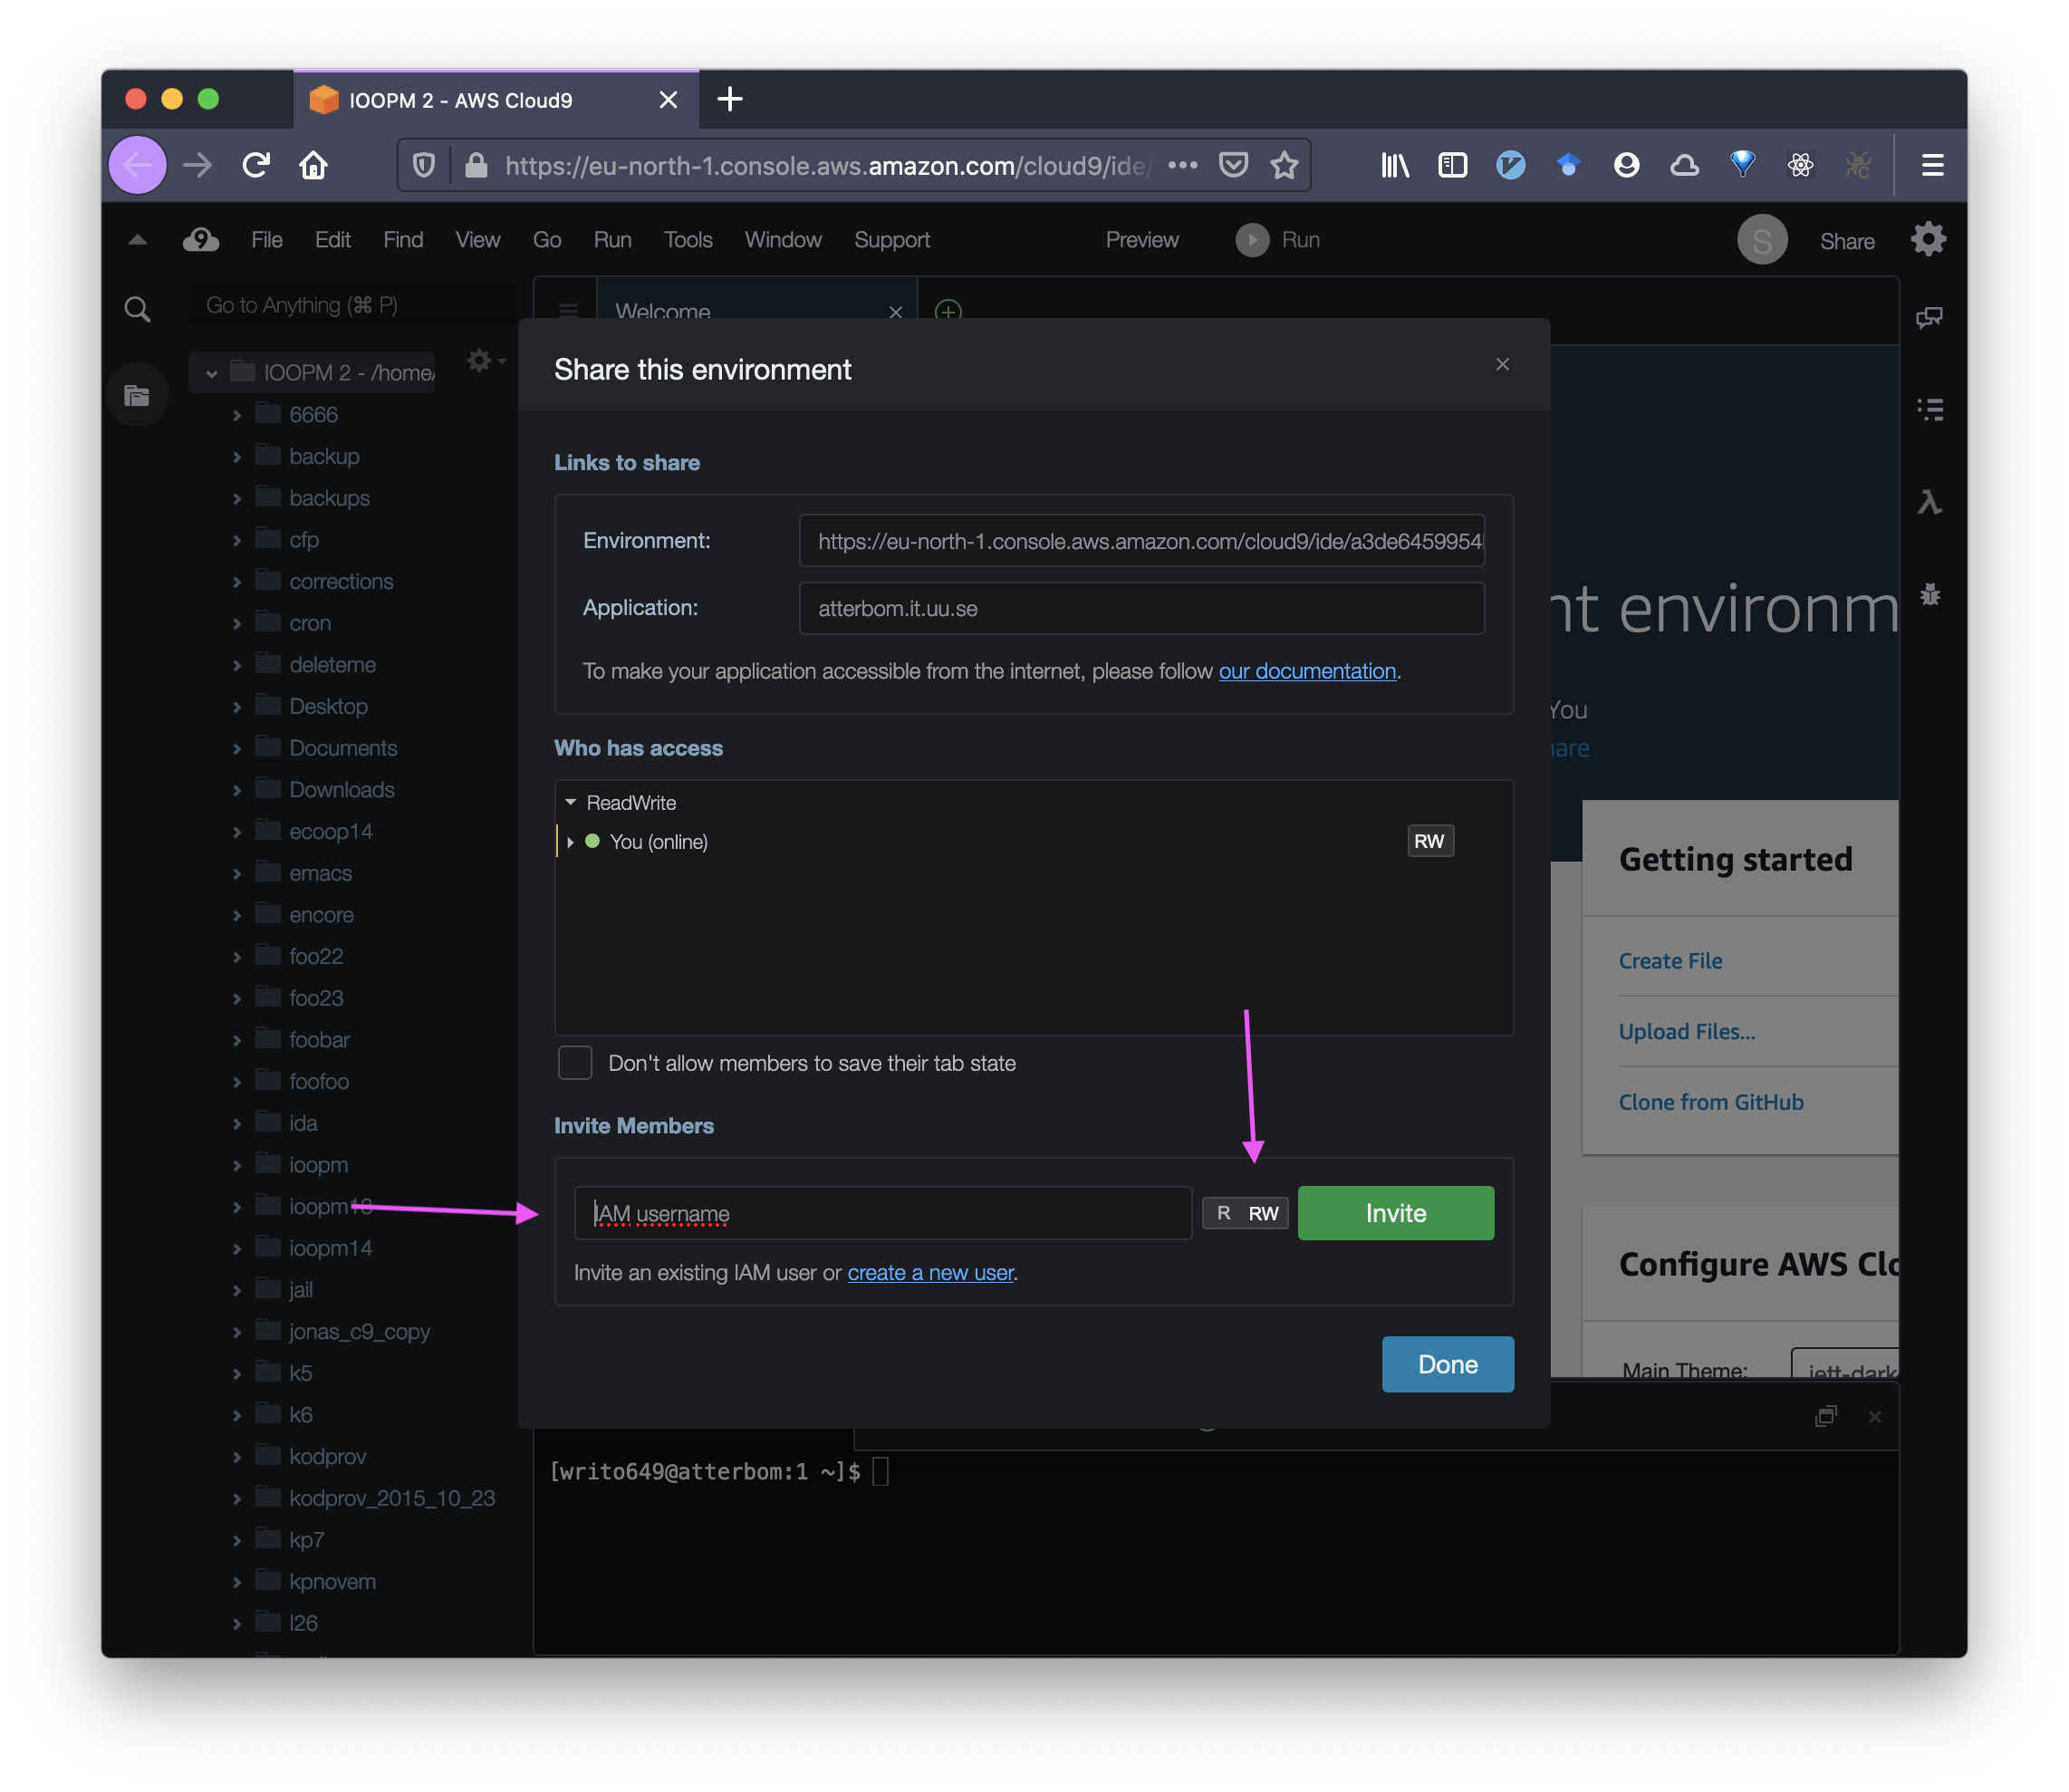
Figure 2: Enter username – keep read/write permissions on unless there is a need to restrict someone
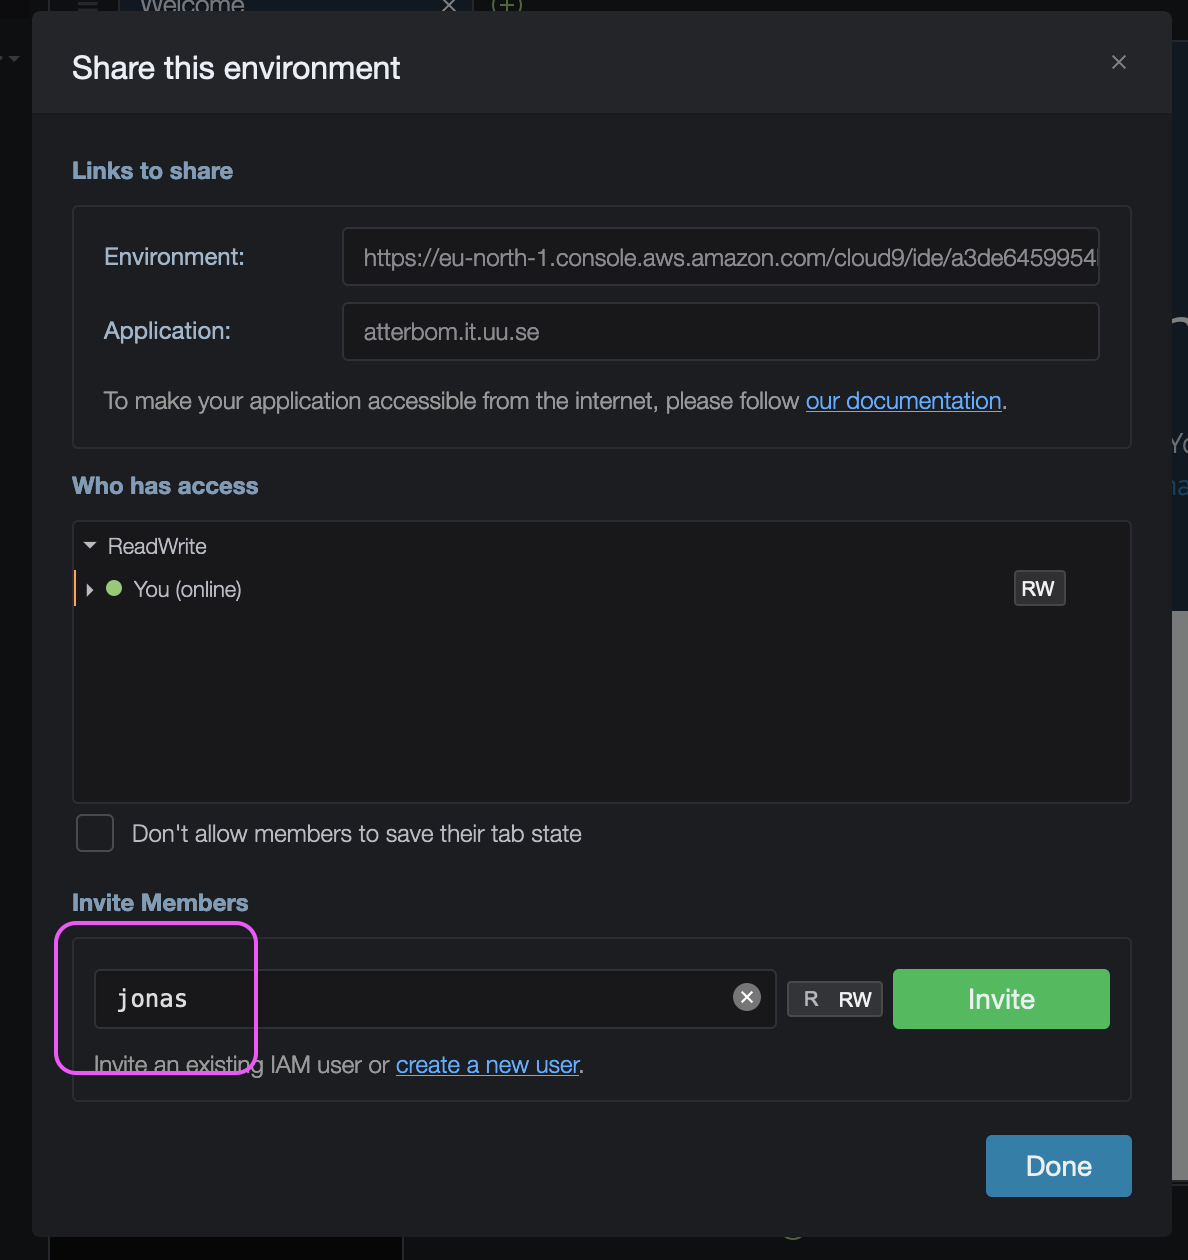
Figure 3: Enter username, then click OK
2.3 Boom! We’re done.

Figure 4: Click Share
3 Changing your backend server
If you for some reason have trouble logging in to your chosen server, you can change it for another. In the panel where you start your IDE, you can click edit and change the host for something else. Please do not do this unless instructed to by the teachers as we have taken care to load-balance all Cloud 9 instances across the servers at IT.
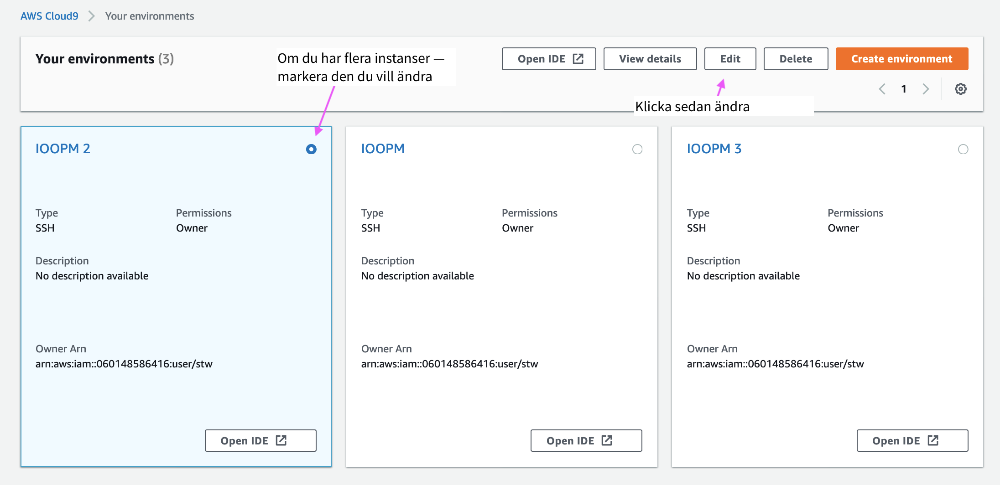
Figure 5: Click edit on your chosen instance
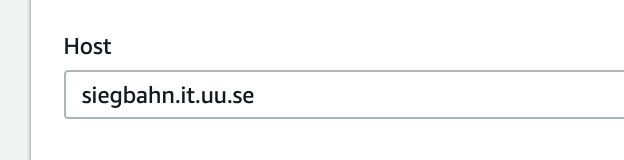
Figure 6: Change the host name for something else
If instructed to change servers, we will give you new suitable host names.
4 Installing Necessary Tools in your New Cloud9
Starting 2020-09-16, we provide a second Cloud9 instance which is backed on separate servers. With this setup, every student has a dedicated computational resource which should be less sensitive to the actions of others. Hopefully this solves the problems that some of you have been experiencing.
In the AWS management console where you normally go to start your Cloud9 IDE, there will be a second Cloud9 instance whose name ends in -aws.
The first time you start this -aws server up, you will need to go to the terminal in Cloud9 and run the following two commands to install the course’s tools:
4.1 Command 1: Make space
To make space, you should run the following command to uninstall unnecesary programs:
sudo yum remove -y docker mysql55 perl mercurial-python27 ruby20-libs perl-Encode php56 php56-common aws-apitools-elb golang subversion php-pear
sudo%20yum%20remove%20-y%20docker%20mysql55%20perl%20mercurial-python27%20ruby20-libs%20perl-Encode%20php56%20php56-common%20aws-apitools-elb%20golang%20subversion%20php-pear%0A
4.2 Command 2: Install tools
To install the tools needed for the course, run the following command:
sudo yum install -y zsh htop valgrind clang6.0-tools-extra.x86_64 lldb.x86_64 doxygen-latex.x86_64 CUnit.x86_64 CUnit-devel.x86_64 http://downloads.sourceforge.net/ltp/lcov-1.14-1.noarch.rpm
sudo%20yum%20install%20-y%20zsh%20htop%20valgrind%20clang6.0-tools-extra.x86_64%20lldb.x86_64%20doxygen-latex.x86_64%20CUnit.x86_64%20CUnit-devel.x86_64%20http%3A%2F%2Fdownloads.sourceforge.net%2Fltp%2Flcov-1.14-1.noarch.rpm%0A
We will update this page with instructions for installing Java
1.8. Right now, Java 1.7 is installed which is even older than
Java 1.8. If you have problems with Java 1.7 (there is no reason
to expect you would), before these instructions are issued, please
use the first Cloud9 IDE running on the IT department ThinLinc
servers (e.g. atterbom.it.uu.se etc.) for the time being.
Note that you will need to re-invite people to your new instance.
Under no circumstances may you change settings for your instance, such as changing how many minutes before the instance is suspended until next activity. Failure to comply with these rules will lead to permanent suspension of your Cloud9 account.
Questions about stuff on these pages? Use our Piazza forum.
Want to report a bug? Please place an issue here. Pull requests are graciously accepted (hint, hint).
Nerd fact: These pages are generated using org-mode in Emacs, a modified ReadTheOrg template, and a bunch of scripts.
Ended up here randomly? These are the pages for a one-semester course at 67% speed on imperative and object-oriented programming at the department of Information Technology at Uppsala University, created by Tobias Wrigstad.